Unleash Your Creativity: A Complete Guide to Modelling Clay and Sculpting Tools for Kids
Are you ready to unlock your child’s creativity with the exciting world of modelling clay and sculpting tools? Look no further! In this complete guide, we will take you on a journey through the wonderful art of modelling clay and provide all the information you need to get started.

Are you ready to unlock your child’s creativity with the exciting world of modelling clay and sculpting tools? Look no further! In this complete guide, we will take you on a journey through the wonderful art of modelling clay and provide all the information you need to get started.
Benefits of Modelling Clay and Sculpting for Kids
- Developing Fine Motor Skills: Sculpting with clay requires precise hand movements and control, helping children develop their fine motor skills. As they shape and mold the clay, they strengthen their hands, fingers, and wrists, which is crucial for activities such as writing and drawing.

- Enhancing Hand-Eye Coordination: Working with modelling clay involves coordinating hand movements with visual information, improving hand-eye coordination. This skill is essential for various tasks, including sports, playing musical instruments, and even everyday activities like tying shoelaces.
- Stimulating Imagination and Creativity: Modelling clay provides an open-ended medium for kids to express their imagination and creativity. It allows them to bring their ideas to life and encourages them to think outside the box. Sculpting with clay sparks their creativity and helps them develop innovative thinking skills.
- Improving Cognitive Abilities: Engaging in sculpting activities stimulates various cognitive abilities in children. It helps them improve their problem-solving skills, critical thinking, and spatial awareness. Sculpting with clay requires them to visualize and plan their creations, enhancing their cognitive development.
- Promoting Relaxation and Stress Relief: Sculpting with clay can be a calming and therapeutic activity for kids. It provides an outlet for them to release stress and tension, allowing them to relax and unwind. Working with clay promotes mindfulness and can be a great way for children to manage their emotions.
- Boosting Confidence and Self-Esteem: As children create their sculptures and see their ideas come to life, it boosts their confidence and self-esteem. Sculpting with clay allows them to take pride in their creations, building a sense of accomplishment and encouraging them to explore their creative potential.
Benefits of Modelling Clay for Kids
Research has shown that engaging in artistic activities like modelling clay can have a positive impact on a child’s brain development. Clay allows children to express themselves freely, encouraging creativity and problem-solving skills. As they experiment with different shapes and forms, they learn about spatial awareness and develop critical thinking abilities. Modelling clay also provides a sensory experience, stimulating the senses and promoting relaxation.
Different Types of Modelling Clay

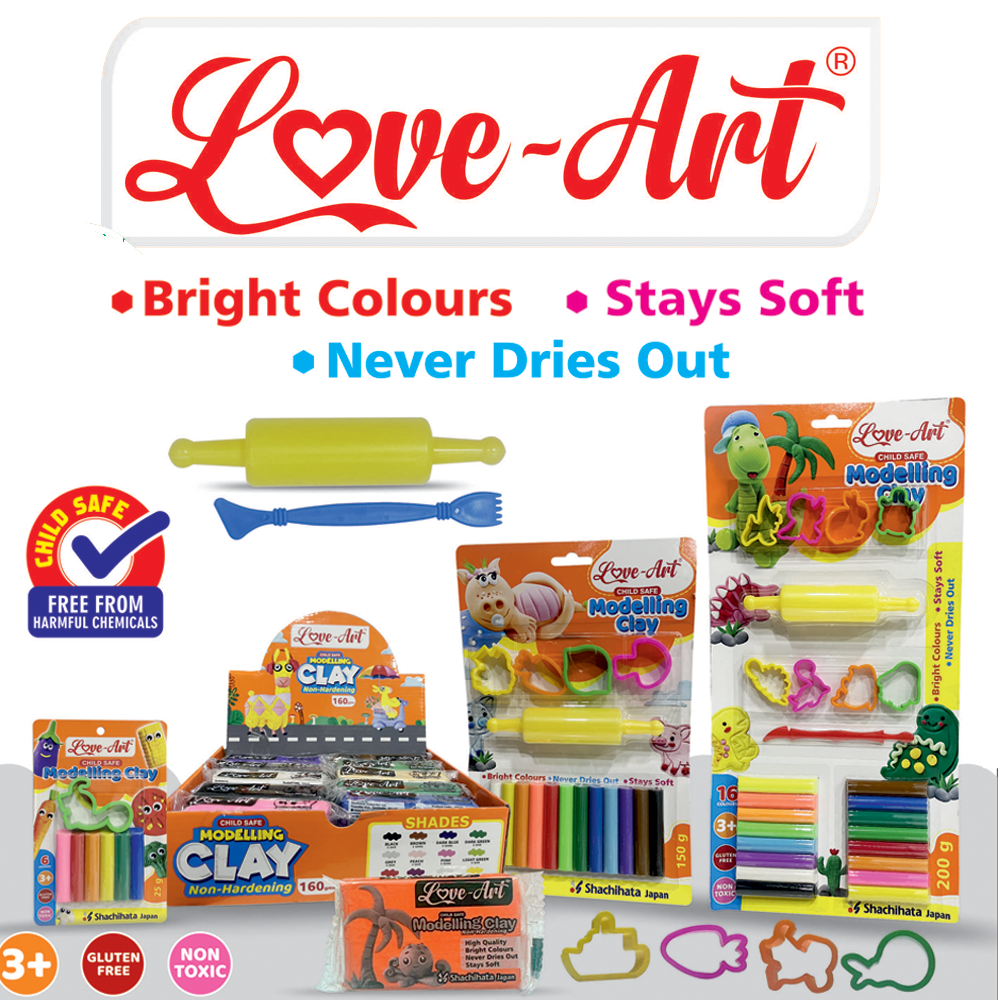
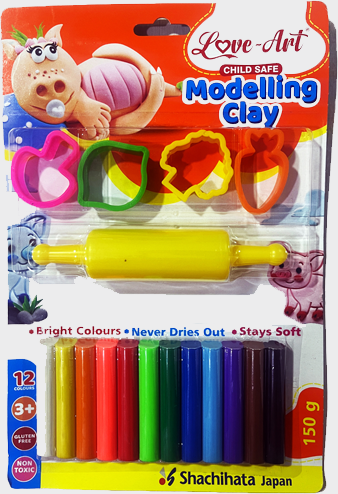
12 colors of clay (150 GMS.), 4 Toys & 1 Roller in Blister Card

16 colors of clay (200 GMS.), 8 Toys, 1 roller & 1 Cutter in Blister Card

6 colors of clay (25 GMS.), 1 Toys in Blister Card

12 colors of clay (150 GMS.), 4 Toys & 1 Roller in Blister Card

16 colors of clay (200 GMS.), 8 Toys, 1 roller & 1 Cutter in Blister Card

6 colors of clay (25 GMS.), 1 Toys in Blister Card

12 colors of clay (160 GMS.) X 12 Bars

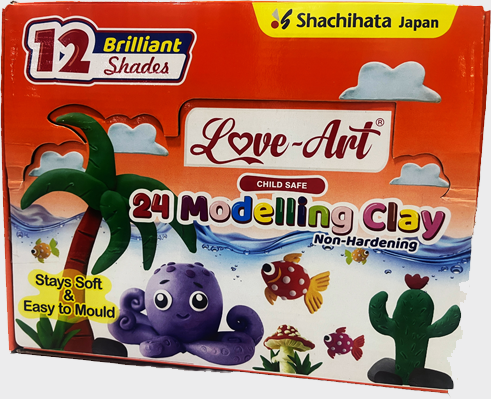
12 colors of clay (60 GMS.) X 24 Bars

12 colors of clay (160 GMS.) X 12 Bars

12 colors of clay (60 GMS.) X 24 Bars
Essential Sculpting Tools for Kids
- Clay Modelling Tools: Clay modelling tools come in various shapes and sizes, designed to carve, cut, and shape clay. They are typically made of plastic or metal and have different tips for creating different textures and details. Clay modelling tools are a must-have for sculpting with clay.
- Rolling Pin: A rolling pin is a versatile tool that helps flatten clay and create smooth surfaces. It is especially useful for larger projects or when working with thicker clay. A small rolling pin can be easier for kids to handle and provides better control.
- Sculpting Knife: A sculpting knife, or clay cutter, is a sharp tool used for precise cutting and sculpting. It allows for clean and accurate lines, making it ideal for detailed work and intricate designs. Ensure that the sculpting knife has a safe grip and a protective cover when not in use.
- Texture Tools: Texture tools add interesting patterns and textures to clay surfaces. They come in various designs, such as stamps, rollers, and texture plates. Texture tools provide endless possibilities for creating unique and visually appealing sculptures.
- Wire Tools: Wire tools, such as wire cutters and wire loops, are used for cutting, slicing, and shaping clay. They are particularly useful for removing excess clay or creating fine details. Wire tools are versatile and can be used for various sculpting techniques.
- Sculpting Sticks: Sculpting sticks, also known as detailing tools, are thin and pointed tools used for refining and adding intricate details to clay sculptures. They are perfect for creating facial features, textures, and small decorations.
Ensure that the sculpting tools you choose are age-appropriate, easy to handle, and made of safe materials. Consider purchasing a complete sculpting tool set to provide your child with a range of options for their sculpting projects.
Safety Tips for Working with Modelling Clay and Sculpting Tools
- Choose Non-Toxic Clay: When purchasing modelling clay, ensure it is labeled as non-toxic and safe for children. Non-toxic clay is free from harmful chemicals and is safe if accidentally ingested. Always read the product labels and choose clay that meets safety standards.
- Wash Hands before and after: Encourage your child to wash their hands thoroughly before and after working with clay. This helps prevent the transfer of dirt, germs, or any residual chemicals that may be present in the clay.
- Use Safe Sculpting Tools: Ensure that the sculpting tools are safe and suitable for your child’s age. Avoid sharp or pointed tools that may cause injury. If using metal tools, supervise your child to prevent accidents.
- Work in a Well-Ventilated Area: Clay can release certain fumes when heated or during the drying process. It’s important to work in a well-ventilated area or open windows to allow fresh air circulation. This helps minimize exposure to any potential fumes.
- Clean Up Properly: After each sculpting session, make sure to clean up the workspace and store the clay and tools properly. Dispose of any clay scraps or unused clay responsibly. This helps maintain a clean and safe environment.
By following these safety tips, you can ensure that your child’s sculpting experience is not only enjoyable but also safe and worry-free.
Step-by-Step Guide to Sculpting a Simple Object
Step 1: Gather Your Materials: Collect the necessary materials, including the chosen type of clay, sculpting tools, and any reference images or sketches for inspiration. Prepare a clean and dedicated workspace for sculpting.
Step 2: Condition the Clay: Before starting, ensure that the clay is soft and pliable. Knead and warm it between your hands to make it more malleable. Conditioning the clay makes it easier to work with and prevents cracking.
Step 3: Plan and Visualize: Visualize the object you want to create and plan its basic shape and proportions. You can sketch it on paper or create a mental image. Having a clear idea of what you want to sculpt will guide your sculpting process.
Step 4 :Start Shaping: Begin by forming a basic shape or an armature for your object. An armature provides structure and support for the clay. Use aluminum foil, wire, or other suitable materials to create the armature if needed.
Step 5: Add Details: Gradually add details to the basic shape, focusing on one area at a time. Use sculpting tools to carve and shape the clay, creating textures, facial features, or any desired elements. Take your time and work patiently.
Step 6: Refine and Smooth: Once the main details are in place, refine the sculpture by smoothing out rough surfaces and blending different clay sections together. Use your fingers or sculpting tools to achieve the desired finish.
Step 7: Let it Dry or Bake: Depending on the type of clay used, allow the sculpture to air dry or bake it according to the manufacturer’s instructions. Be patient during the drying process, as rushing may cause cracks or deformities.
Step 8: Finishing Touches: After the sculpture has dried or baked, you can further refine and enhance it. Sand any rough edges, apply paint or varnish if desired, and add any final touches to bring your creation to life.
Remember, sculpting is a process that requires practice and patience. Encourage your child to enjoy the journey and embrace any imperfections as part of their unique creations.
Advanced Sculpting Techniques for Kids
- Sculpting with Armatures: Introduce your child to the use of armatures to create more complex sculptures. Armatures provide a sturdy foundation and allow for more dynamic poses and intricate details.
- Sculpting with Texture: Experiment with different texture tools to add depth and visual interest to sculptures. Create patterns, scales, fur, or any desired textures using stamps, rollers, or handmade texture plates.
- Sculpting Portraits: Challenge your child to sculpt human or animal portraits, focusing on capturing facial features and expressions. This technique helps develop observation skills and attention to detail.
- Sculpting with Mixed Media: Combine clay with other materials, such as wire, beads, or fabric, to create mixed media sculptures. This adds dimension and allows for more creativity in their artwork.
- Sculpting Landscapes: Encourage your child to create miniature landscapes or dioramas using clay. They can sculpt trees, rocks, and other natural elements to bring their scenes to life.
By exploring these advanced techniques, your child can further refine their sculpting skills and push the boundaries of their creativity.
Fun and Creative Project Ideas Using Modelling Clay
- Clay Animals: Let your child’s imagination run wild by sculpting their favorite animals. They can create a zoo, a farm, or even a mythical creature using various colors and textures.
- Clay Jewelry: Design and make unique jewelry pieces using polymer clay. From earrings to necklaces, your child can create wearable art and express their personal style.
- Clay Miniatures: Challenge your child to create miniature scenes or objects, such as a tiny kitchen, a dollhouse, or a garden. This project encourages attention to detail and offers endless storytelling possibilities.
- Clay Fruits and Vegetables: Sculpt colorful fruits and vegetables to create a play kitchen or a market stall. This project teaches kids about healthy eating and encourages imaginative play.
- Clay Story Characters: Let your child bring their favorite storybook characters to life by sculpting them with clay. They can recreate scenes from their favorite books or invent new adventures.
These project ideas are just the beginning. Encourage your child to come up with their own unique ideas and let their imagination take the lead.
Privacy | Disclaimer | Sitemap
Disclaimer
Sitemap
©2023 Artline India. All rights reserved.